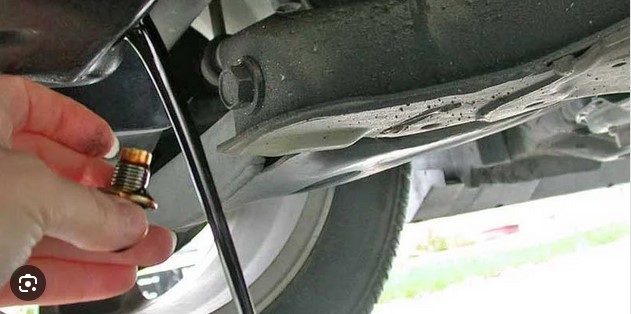
Maintaining your vehicle is crucial to its longevity and performance. One of the routine tasks every vehicle owner should know is how to remove an over-tightened oil plug. In this guide, we’ll walk you through the process, providing you with insights, tips, and expert advice to ensure a smooth and successful oil plug removal.
Contents
- 1 1. Getting Started: Understanding the Importance of Proper Oil Plug Removal
- 2 2. Necessary Tools and Equipment
- 3 3. Safety First: Precautions to Take
- 4 4. Step-by-Step Guide to Removing an Over-Tightened Oil Plug
- 5 5. Common Mistakes to Avoid
- 6 6. FAQs About Removing Over-Tightened Oil Plugs
- 7 Conclusion
1. Getting Started: Understanding the Importance of Proper Oil Plug Removal
Before diving into the steps, let’s discuss why it’s essential to remove an over-tightened oil plug correctly. An over-tightened plug can lead to stripped threads, leaks, and other complications, potentially causing damage to your engine.
2. Necessary Tools and Equipment
Gather the tools you’ll need for the task, including a socket wrench, gloves, a drain pan, and a new oil plug gasket. Having the right tools on hand will make the process much more manageable.
3. Safety First: Precautions to Take
Safety is paramount when working on your car. Park it on a level surface, engage the parking brake, and wear appropriate protective gear to prevent accidents and injuries.
4. Step-by-Step Guide to Removing an Over-Tightened Oil Plug
4.1 Loosen Surrounding Components
Before removing the plug, ensure there’s enough space to work. Loosen any components or shields that might obstruct your access to the oil plug.
4.2 Apply Penetrating Oil
If the plug is stuck due to rust or corrosion, apply a penetrating oil around the plug’s edges. Allow it to sit for a few minutes to loosen the grip.
4.3 Choose the Right Socket Size
Select the correct socket size that fits snugly over the oil plug. Using the wrong size can lead to further damage.
4.4 Apply Even Pressure
Insert the socket wrench onto the plug and apply even, steady pressure in a counterclockwise direction. Avoid excessive force to prevent rounding the plug.
4.5 Use a Breaker Bar
For stubborn plugs, a breaker bar can provide extra leverage. Gently apply force until the plug begins to turn.
4.6 Replace the Oil Plug Gasket
Once the plug is removed, replace the old gasket with a new one to prevent leaks when reinstalling.
5. Common Mistakes to Avoid
5.1 Over-Tightening the Plug
Avoid the temptation to over-tighten the plug during reinstallation. This can lead to the same problem you’re trying to fix.
5.2 Using Excessive Force
Applying too much force while removing the plug can result in rounded edges or damaged threads. Patience is key.
6. FAQs About Removing Over-Tightened Oil Plugs
Q: Can I use WD-40 as a penetrating oil?
Yes, WD-40 can work as a penetrating oil to help loosen a stuck plug. However, dedicated penetrating oils like PB Blaster are often more effective.
Q: How do I know if the threads are stripped?
If the oil plug easily turns but doesn’t seem to tighten or hold, the threads might be stripped. It’s best to consult a professional mechanic in this case.
Q: Can I reuse the old oil plug gasket?
It’s recommended to use a new gasket every time you remove the oil plug. Reusing old gaskets can lead to leaks.
Q: What do I do if the oil plug is still stuck after following these steps?
If the plug remains stuck, it’s advisable to seek assistance from a qualified mechanic. Attempting to force it further could cause more damage.
Q: How often should I change my oil plug gasket?
You should replace the oil plug gasket every time you change your oil. It’s a small but crucial component for preventing leaks.
Q: Can I drive my car with a loose oil plug?
Driving with a loose oil plug can lead to oil leaks and engine damage. It’s important to address the issue promptly.
Conclusion
Removing an over-tightened oil plug may seem like a daunting task, but with the right tools, knowledge, and precautions, it can be a straightforward process. Remember to prioritize safety, take your time, and follow the steps outlined in this guide. By doing so, you’ll ensure a successful oil plug removal and maintain the health and performance of your vehicle’s engine.
You may also read:
